Background
Continuing from Blog 1, we’re working on Rumble Rally as we begin a new sprint. Though this sprint I picked up a lot more speed to get ready for an upcoming playtest. This time, refining the player controls, and geting a fully playable demo online.
New Car Controller
So last blog, I’ve begun to work on the controller for the car. But at the end of the post, I’ve mentioned several problems I needed to try and fix. Overall the previous solution was getting larger and larger, becoming harder to modify it’s behavior to how we wanted it to behave. So I decided to scrap it and try and remake the new car controller that’s easier to work with while the implementation is still relatively small.
First, Understanding WheelCollider values
First thing I needed to do was to try and understand the different values of Wheel Colliders first. Apparently, last time I’ve been setting the wheelDampingRate quite high as I was told it determines the responsiveness of the vehicle. Actually, wheelDampingRate acts kinda like drag, indicating how resistant the wheel is to change in forces. So setting it really high effectively was like slamming the brakes while trying to go forward! No wonder it took a lot of force to drive and stop the car.
New Wheels
I’ve also found myself changing a lot of values for the wheels to make it drive, brake, drift, charge, etc. Previously, each wheel was set as a variable for the front and back axels, and the left and right sides. But as these were variables, I needed to manually adjust these settings on each of the WheelColliders individually.
This becomes cubersome and difficult to manage, so I decided to take all the wheels of the car and shove them in an array. This allows me to iterate through the array and set each wheel. I also marked the wheels with which axel or side they belong to, allowing us to filter which particular wheels we’d like to modify (so when drifting, front wheels still torque, while back wheels brake and increase skid).
// Use a filter function to optionally filter which axel or side a wheel belongs to
public bool Filter(WheelAxel? wheelAxel, WheelSide? wheelSide) =>
    (wheelAxel == null || this.axel == wheelAxel) &&
    (wheelSide == null || this.side == wheelSide);

// Apply modifies the wheels in an array iteratively (also optionally using the above filter)
public static void Apply(
    this ImprovedWheelController[] wheels,
    Action<ImprovedWheelController> fn,
    WheelAxel? axel = null, WheelSide? side = null
)
{
    foreach (var wheel in wheels)
        if (wheel.Filter(axel, side))
            fn(wheel);
}

// Allowing one-line modifications like this
target.wheels.Apply(wheel => wheel.Brake = 0);
Finite State Machines
The last part that’s essential to the new controllers was the addition of state machines. Our car previously had the left and right triggers mapped to brakes and throttle respectively, but we also wanted controls for driving, braking, drifting, reversing, boosting, etc. This led to convoluted code where switching between different controls would need to reset the previous controls (i.e. brakes and drifiting would apply brake torque, which needs to be cleared when switching to driving).
Though, thinking about the controls as different states we switch between made the complex controls a lot more manageable in code. The neat thing about Finite State Machines (or FSM) is that they often have events for when you enter or leave a state. In addition to each state having their own in-depth behavior of what input switches the state to a differenc control scheme. So our BrakeState can activate the breaks when it enters, update checks if the brakes are held, and finally release the brakes as we exit.
It especially came in handy for more complicated controls where two buttons are involved (like drifting), delaying switching between controls (like switching to reverse if brakes are held), or locking controls while another is active (charging and speed boosts takes precedence over the other states, only exiting when it is completed).
Overall, this new system allows us to seamlessly and intuitively change the car’s controls among 5 different states from the use of just the two gamepad triggers.
Multiplayer
Our game is intended to be multiplayer, so the next important feature was to get our game to support multiple gamepads to control multiple players. Unity handles this using PlayerInput component. When spawned, they connect one player’s input to one game object with the component attached. So, our car controller is setup with a PlayerInput component. I also made a GameManager, which has a list of players to spawn (allowing players to pick their player and have that setting persist between states). Then the player looks in the current level for objects with a spawn point component (another simple script I made), and spawns the players at the cooresponding positions. Unity does the rest hooking all the inputs to the players.
Importing Models
All this time, I’ve been working with the Kenney race car asset, just to get the game going while waiting for the model. Though our modellers have finished making a few cars, so it’s time to import at least one!
This is the first car to include, with the driver named Ron Rally. As the car controller was already pretty flexible, importing and setting up was a seamless and painless process. Though we wanted to have some animations to give more feel and character to the car. Things like making the car tilt forward and back as it accelerates, make the antenna wobble, etc. Though this was initially going to be keyframe animated, I recommended against that and instead pitched using physics to make them respond naturally.
The car’s WheelColliders already have spring physics to simulate suspention, which make the car tilt as it’s acceleration changes. The antenna was rigged by one of our animators, so I tried hooking up the bones to some physics joints to give it a little bit of “jiggle physics” as the car moves.
It took some trial and error to tune the settings to work nicely. Some previous attempts made for hilarious results that lift the car off the floor by the antenna.
Physics can be weird sometimes, but when implemented correctly, it makes the antenna do a little bobble as the car moves!
Oh, and you’ll notice the blue and red cars! Our artists made variant textures so multiple players have their car indicate their color. The automatically set’s the model’s color based on the player’s index!
UI, Charge, and Gameplay
Afterwards, I started to hookup the car’s stats to the UI. I had to do a little modifications to the UI in order to get it to readjust it’s elements based on screensize (the previous one had elements in static positions with the same anchor, so they often get off screen or annoyingly in the middle of the screen).
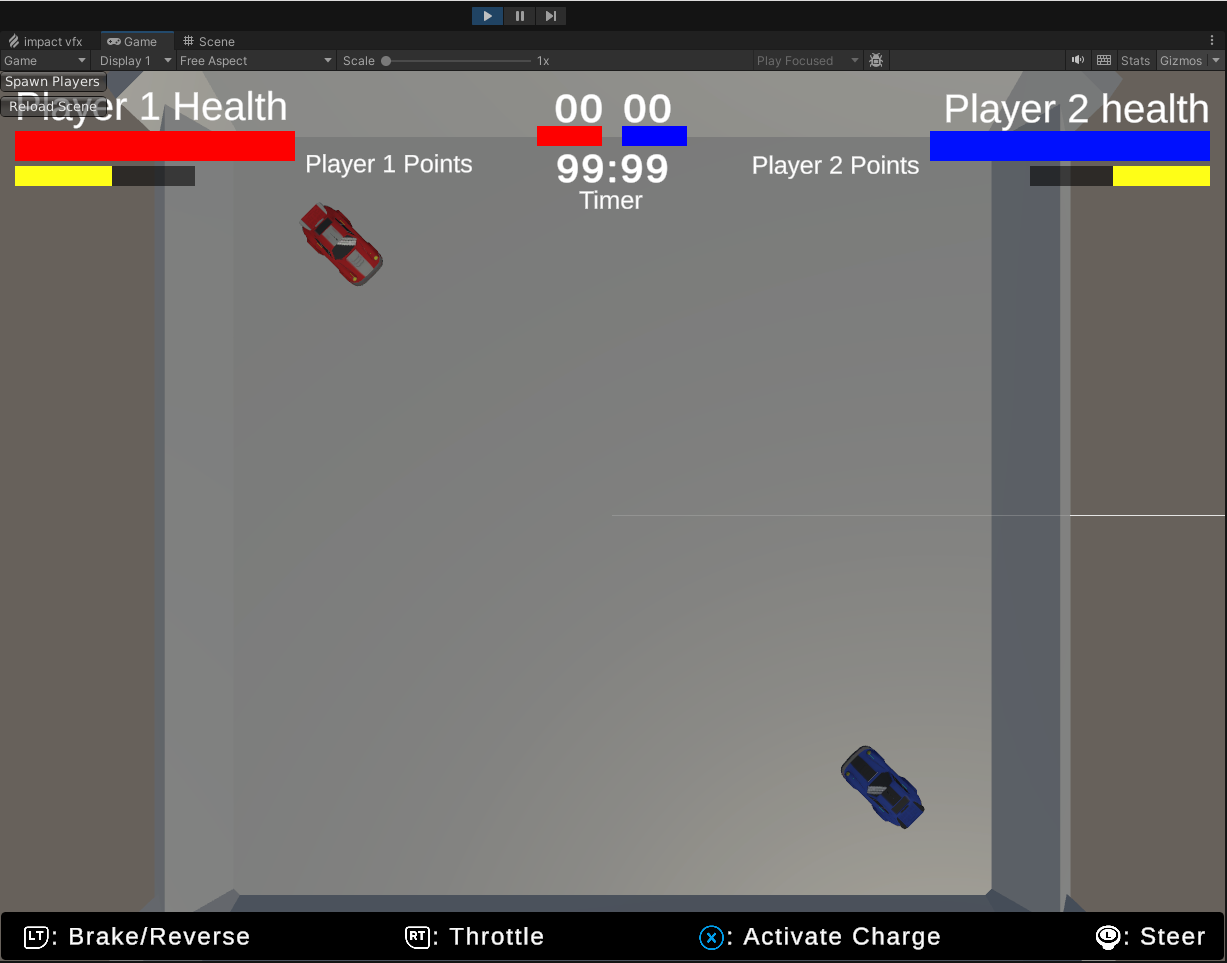
The UI updates to display player’s health and charge amount.
Which also leads into the charge ability which I started implementing. The main way (currently) that player’s deal damage is by smashing into their opponents while charge mode is activated. The charge mode I created used another state machine so charge replenishes over time by default. Activating charge subtracted a fair sum, while sustaining it depleted the charge meter over time. Then there was a cooldown before charge starts to refill again.
In gameplay, it looked something like so:
There is also a countdown before the round starts to prepare the players to fight. Then the player’s finally get control of their vehicle to battle. Finally, when a player dies, there is a new LevelManager to track which player’s die and survive, allowing us to determine a winner and reset the round for the next game. Though the next feature I need to complete is getting the game to total the number of rounds won and determin the winner of the game.
And for playtesting, I added controls to the bottom of the screen using icons from another Kenny asset pack. At least for now to make it a little clearer how to play the game.